

A useful feature of Windows is being able to connect to your desktop from another location to remotely manage your computer. While this functionality is native in Windows 7 and previous versions, it is not supported by default in many Linux distributions, including Ubuntu. However, using any of the tools available, you can connect to a Windows remote desktop with ease. This tutorial will show how.
NOTE: This tutorial works on Ubuntu 10.10 & 11.04.
Step 1: Enable Remote Connections for Windows 7
In order to allow other computers to connect remotely to your Windows 7 computer, you need to enable the Remote Desktop functionality. To learn how to do this, check out this tutorial: Enabling Remote Desktop Connections in Windows 7.
Step 2: Install a Remote Desktop Client - Our Choice: Remmina Remote Desktop Client
By default, Ubuntu doesn’t come with a remote desktop client which supports the Remote Desktop Protocol (RDP) used by Windows operating systems for remote connections. You need to install one of the clients available in the Software Center.
First, start the Ubuntu Software Center, by going to Applications -> Ubuntu Software Center. In the Get Software section, search for ’remote desktop’. You will see a list with many alternatives. For this tutorial, we preferred to choose Remmina Remote Desktop Client, a client which is very appreciated by the user community and is, at the same time, very versatile and easy to use.
To get it installed, select it and click Install.

You are asked for your password. Type it and click Authenticate.
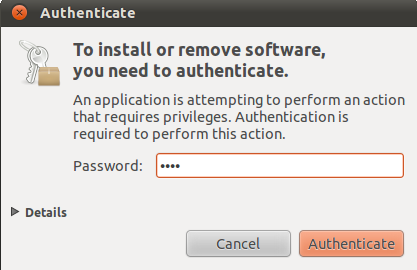
NOTE: please keep in mind that, in order to install software, your user account needs to have administrative permissions. If you are set as a Desktop user, you cannot install any software.
Now the application is downloaded and installed. Wait until the procedure ends.
Step 3: Configure the Remote Desktop Session
Now it is time to start the Remmina Remote Desktop Client by going to Applications -> Internet.

Click on the New Connection button.

This opens the Remote Desktop Preference window, where you can configure the remote connection.
In the Profile section, type the name you want to use for the connection. It can be anything you wish.
Then, in the Basic tab, complete the IP address of the Windows computer in the Server field. Then, type the username and password you want to use to connect to the Windows computer. Be aware that the user needs to be defined on the Windows computer.
You can also set the Resolution you want to use for the connection and the Color depth.

NOTE: Selecting a larger desktop size and color depth can impact the performance of your remote desktop session. If you experience lag when connected to a remote desktop, try reducing the color depth or resolution.
If you want to share a folder existing on your Ubuntu computer with the Windows computer, simply check the Share folder box and select the folder you want to share from Ubuntu.
Also, for more advanced settings, go to the Advanced tab. There you can turn the sound on or off, share printers, disable clipboard synchronisation, etc.

Once you are done making all the settings, click on the Connect button. After a while, if the Windows computer is turned on, you should be connected to it.

Once you close the remote connection, Remmina Remote Desktop Client automatically saves it so that you will be able to reconnect at a later time, with a simple click on the connection name.

Conclusion
As you can see, the procedure is not really complicated. As long as you make the right settings and use a client which supports the RDP protocol, connecting remotely from Ubuntu to a Windows desktop is almost a trivial task.
References: http://www.7tutorials.com/connecting-windows-remote-desktop-ubuntu
References: http://www.7tutorials.com/connecting-windows-remote-desktop-ubuntu
No comments:
Post a Comment