Windows is extremely customizable and power users tweak everything, but some of its most common settings are found in the Control Panel. If you’ve read our guide to the Control Panel, you know how many useful configuration options it holds, but the menus can prove difficult to navigate.
Activate 'god-mode', on Windows 10, and you don't get to lose sleep over privacy https://t.co/BRM8EDmGOT
Enter God Mode, a system shortcut that gives you access to all Control Panel items in one handy place (not like a video game cheat code!). It works on Windows 7 and above, and on Windows 10 it’s notable for bringing options from the Settings app and the Control Panel together.
To enable it, simply create a new folder on your desktop: Right-click > New > Folder and name it the following string:
GodMode.{ED7BA470-8E54-465E-825C-99712043E01C}
If you don’t like the name God Mode, replace the text before the period with something else, such as “Administrator” or “All Settings.” Once you hit Enter to create the folder, it will morph into a Control Panel icon and you’ll have access!
Despite its name, God Mode doesn’t let you do anything crazy, but is basically a shortcut. It’s great for IT workers who want common functions all in one place, or anyone who just wants a simple list of everything you can change in Windows. If you like a clean desktop, just drag the icon to your Start Menu or into another folder.
How did I go all this time without knowing about God Mode administrative settings folder on Windows? o.o — Remrie Arrie (@Remrie) September 7, 2015
Often the question of “Which smartphone do you advise me that will saves battery life,” becomes very complicated, because each battery lasts depending on the type of use that we make of it. Anyway one of the most frequently asked questions is "How to saves battery life of our smartphone?" and, as the usual advice can be helpful, now we show you another reason why the life of our battery can be slightly elongated.
The issue is particularly also because the main culprits of poor battery life are the displays of smartphones that, depending on the model, can be LCD or AMOLED (including the main). What are the differences?
AMOLED vs LCD: Who consumes more battery?
Despite the eyes of the inexperienced may seem the almost the same and the same thing, but between AMOLED and LCD there are net differences:
LCD Display: This type of screens mounted on many of the Android devices on the market, when it displays an image, not reflected by its own light but uses that of panels placed under them. Thus, even a black image, with a display LCD, it shows lit and never darkened, because the panel at the bottom there will always return a light pulse.
Display AMOLED: These displays, however, are more intelligent in that they use their power to provide the image on the screen that then we’re going to look at. The question battery, then, seems to be better with these panels, with a black background, use less energy as each individual pixel will be powered separately.
Essentially, therefore, the trick of the black background is functioning only on devices that mount an AMOLED display (i.e the setting of a screen very dark or totally black to exploit the special characteristic of AMOLED panels), since, as we have already said, a background black could make remain deactivated few pixels and, accordingly, could make us saves battery life up to 6% per hour.
In the smartphone with display LCD, this trick does not work because even with a black background, the panels will always continue to light and, consequently, to consume battery.
Therefore, AMOLED display saves battery life of your smartphone.
How to install: First step for everything you do: Create a nandroid backup and make sure you know how to restore it!
I'm not responsible for anything you do with your phone/tablet/rice cooker.
There is also the risk to soft-brick your device. In such a case, restoring a backup is the easiest way to get rid of it (other possibilities mentioned below).
For the framework:
Download the Xposed Installer APK and install it
Launch the Xposed Installer, go to the "Framework" section and click on "Install/Update" In case you get a Segmentation Fault error, please install this additional app (not needed if the installation worked fine).
4) INSTALL SPOTIFY FROM PLAY STORE (if you haven't allready)
This method should work on most devices. In case it doesn’t work on your device, then we have to install another Xposed module.
Optional:
Step 1. Open the Xposed Install app > Download > Search for “App Settings” in the search box and open it from the results. Swipe to the Versions tab > Download and then Install the app.
Step 2. Go to Modules tab and tick the checkbox next to it > Reboot.
Step 3. Open App Settings from your app drawer and wait for it to load all your Apps. Find Spotify in the list and select it. Click on Off/On button to enable it.
Step 4. Do the following changes:
1. Font scale : 80
2. Screen (dp) : 800 x 1280 OR 1000 x 1600
Click on the Save button > OK.
Now go to Home and open the Spotify app. You will get Unlimited Skips and be able to play any songs from playlists or searches.
VOILA!
++ BONUS: STREAMING TO DLNA ENABLED DEVICES (FOR EXAMPLE YOUR HDTV)
INSTALL BUBBLEUPNP FROM PLAY STORE
GO TO XPOSED INSTALLER -> DOWNLOAD -> SEARCH: BUBBLEUPNP -> DOWNLOAD & ENABLE -> REBOOT
LAUNCH SPOTIFY, PLAY A TRACK
TURN ON YOUR TV, MAKE SURE THAT YOUR PHONE AND TV ARE CONNECTED TO THE SAME WI-FI
LAUNCH BUBBLEUPNP -> GO TO PLAYLIST -> AUDIOCAST -> PLAY
EXAMPLE: Secured Log On CTRL+ALT+DELETE screen NOTE:If you have a tablet connected to your computer with it's drivers installed, then you may see Press CTRL + Alt + Delete or use the Windows Security Button to log on instead.
OPTION ONE Through Advanced User Accounts
1. Open the Start Menu.
2. In the search line, type netplwiz and press Enter. (See screenshot below)
3. Click on the Advanced tab. (See screenshot below)
4.To Enable Secure Log On A) Check the Require users to press Ctrl+Alt+Delete box. (See screenshot above) NOTE:If the setting is grayed out, then see OPTION TWO below.
B) Go to step 6.
5.To Disable Secure Log On A) Uncheck the Requires users to press Ctrl+Alt+Delete box. (See screenshot below step 3) NOTE:If the setting is grayed out, then see OPTION TWO below.
6. Click on OK. (See screenshot below step 3)
OPTION TWO Through Local Security Policy
Note: When this option is set to Disabled or Enabled, it will override and gray out the settings in OPTION ONE above.
When this option is set to it's default Not Defined, then the settings in OPTION ONE above are no longer grayed out and can be set to how you like.
Say you have a movie on DVD, but you want to watch it on your phone, tablet, somewhere else. You can "rip" that DVD—or turn it into a movie file on your computer—to play it wherever you want. Here's how to do it.
Ripping a movie to your hard drive can seem like a complicated task, but it's actually pretty simple. There are a lot of ways to do it and a lot of different programs out there, but our favorite method uses a program called Handbrake. It's easy to use, it's available for Windows, Mac, and Linux, and it'll convert your file into compatible formats for any device, like an iPad or Android phone. The video above should walk you through the process, but you can follow along with these instructions.
Head to Handbrake's homepage and download the program. Install it to your computer as directed.
By default, Handbrake can rip unprotected DVDs, but most DVDs you buy from the store have copy protection. To get around this, you'll need to install libdvdcss. On Windows, you can download this file separately (for 32-bit systems and for 64-bit systems), rename it to libdvdcss.dll, and put it in your Handbrake program folder (C:\Program Files\Handbrake). If you're on a Mac, download this file and double-click to install it.
Insert the DVD you want to rip, and open Handbrake.
Click the Source button in the upper left-hand corner and choose your DVD drive from the list. It will start scanning your DVD, which could take a few minutes.
When it's done, head to the "Title" drop-down menu in the upper left hand corner of the window. This is where you'll select which part of the DVD you want to rip. In the case of movies, it's usually the longest title, so just pick that one. If you're ripping episodes of a TV show, it's usually the 22 or 44 minute ones, and you'll have to rip them each separately.
Click the Browse button on the right side of the window. Navigate to where you want to save your movie file, and type in a file name in the box. Click OK.\
Next, head to the bar on the right labeled "Presets". This is where you'll choose what format the resulting file will be in. If you just want to watch it on your computer, the "Normal" or "High Profile" preset is fine. If you want to watch it on something like your iPod or iPhone, though, pick the correct preset from the list.
Hit the Start button at the top of the window. This will take awhile, so you'll probably want to grab a cup of tea.
When it's done, you'll get a popup notification. From there, you can double-click on your movie file to watch it, or sync it to your device of choice. Enjoy!
It seems like a lot of steps at first, but it really isn't very difficult—especially after your first time through. Once you've installed the libdvdcss file, for example, you can skip that step in the future.
It's just a matter of picking the right chapter from the DVD and ripping it to the right format. Note that if you're going to be ripping a lot of DVDs, you can head to Tools > Options (or Handbrake > Preferences, if you're on a Mac), and hit "Browse" next to "Default Path" to choose a location for all the other movies you rip in the future. You can also click "Add to Queue" instead of "Start" and rip multiple files at once, which is great for ripping TV shows.
Background: Samsung/T-Mobile/AT&T, Android version 4.2.2, had not includes the Chinese language and many others. The only languages available was: Deutsch, English, Espanol, Francais, Italiano, and 한국의.
Causes: Android is the most popular platform for mobile devices like phones and tablets across the world with billions of user base and millions of new activation per day. There are more than 200 countries (dependent and independent) with people speaking various languages. All of us like to have the user interface and input language of our device to be in our native tongue to which we are so innately connected.
Since it is not possible for any OEM to put all languages in every device universally, they generally divide the world into regions and countries and offer languages and connectivity options depending on that specific region. With the growth in technological advancements, the vast world has also grown into a smaller place with people of one country live in other countries. To address this issue, most OEMs ship their devices with some most spoken languages pre-loaded. However, under your Android device language settings you might not be able to see them all because they are hidden by default.
English, being an international language, can be found in all devices but the case might be different with other languages like Spanish, Arabic, Chinese, Thai, Russian, Portuguese, German, Italian, French, Dutch, Greek, Indonesian, Polish, Serbian, Swedish, Turkish, Vietnamese, and so on. If you have installed a firmware meant for some other country/region on your Android device, you may or not find your language in it. There are no separate language packs available for users that can be downloaded and installed.
Get Your Native Language without Root
If you do not have root access on your Android device, you can still get your local language on it. Google Play Store has a very nice app for this. It is called MoreLocale 2 and is available for free.
For new Android users, rooting an Android phone can often be an intimidating process, especially since there are so many different ways to gain root access, depending on your model and firmware version.
I've previously covered a way of doing it for the AT&T version of the Samsung Galaxy S4 that has the MF3 firmware on it, but you needed an SD card reader, unzipping software, a terminal emulator, and more. Definitely not an easy task for a first-time rooter.
However, thanks to the crafty developers at Kingo App, root can be attained with just one click now, and not just for the GS4, but for almost any Android phone on the market.
Read & Heed, Before You Proceed
You'll need to have the following components ready:
Your Samsung Galaxy S4
Micro USB cable
A Windows PC
Also be aware this rooting method does not install a custom recovery. A recovery is a software that lets you flash custom ROMs like CyanogenMod onto your phone, as well as perform system level maintenance, like backing up and restoring nandroid files. You'll have to manually install a recovery yourself if you'd like to do that.
If you have the Verizon Galaxy S4 with ME7 firmware, or AT&T Galaxy S4 with MF3 firmware, unfortunately your bootloader is locked, so you won't be able to install a custom recovery at all. Attempting to install a recovery like ClockworkMod or TWRP will likely turn those SGS4 variants into nothing more than shiny, expensive paperweights.
Even if your Galaxy S4's bootloader is locked, you can still attain root with this method.
Step 1: Enable USB Debugging
You'll need to have Developer options enabled, which you can easily do by following Faisal's softModder guide. You can then access Developer options by going to your SGS4's Settings -> More, and it'll be the second from the bottom. Tap on it, then make sure USB debugging is checked.
Step 2: Download & Install Kingo Root on Your PC
This one-click rooting method is provided by Kingo. You can grab the PC software from their download page. The download should start within a few seconds of opening the page on your computer. If you have another device to root, Kingo probably supports it too (just make sure to check out their list of compatible devices for reference).
Once you've downloaded the file, open it up and run the installer, then open up the program.
Step 3: Connect Your SGS4 to the PC
Connect your Galaxy S4 to your computer with the micro-USB cable. Kingo Root will detect it and start installing the device's drivers (if necessary).
You may be prompted to disconnect the phone for the drivers to finish installing. Go ahead and disconnect the cable, and Kingo will let you know when to reconnect it.
Keep an eye on your phone for an "Allow USB debugging?" alert. Make sure to choose OK.
Step 4: Get Ready to Root!
You should now be at this screen in Kingo:
Read through King's Root Notifications, then click the orange ROOT button when you're ready. This step may take a few minutes, and once it's successful, you should see this screen:
Click the Finish button and reboot your SGS4.
Step 5: Verify Root with Root Checker
Download joeykrim's very popular Root Checker app from Google Play, which verifies whether your device has root or not.
Open up the app then tap on the Verify Root Access button. A Superuser request should pop up, so select Grant.
You'll now see the words that every softModder wants to see on their Android phone: "Congratulations! This device has root access!"
You're Rooted! Now What?
With root privileges on your device, you can now install apps and mods that require root access. One of the most popular modifications to install is the Xposed framework. It's quite simple to install, and once it's on your phone, you can add all sorts of mods and customizations.
Knowing how to boot your Samsung Galaxy S4 into recovery mode and download mode is extremely important especially when you are looking forward in tweaking your smartphone. Actually, you will not be able to perform official or unofficial operations on your device without having to enter the recovery (stock or custom) and download mode. So, if you are new to the Android system and want to learn more about its features, then you are in the right place; here on Android Flagship our team will develop important and useful tutorial that will teach you how to use and operate your Android based device.
However, today we will be checking on how to perform an easy task: booting into recovery and download mode. The present tutorial will be suitable with the Samsung Galaxy S4 (any model of the same) though the procedure mentioned below can be safely performed (the steps will work) on any Samsung branded smartphones. So, this is something like a general step by step guide meaning that it will work for any Samsung branded devices; of course the handsets that are being powered by the Android OS.
SGS4 Download and Recovery Mode
Now, the Galaxy S4 is one of the most powerful smartphones released on the market (it competes with the HTC One, Xperia Z and of course with the iPhone 5). Anyway, the best is that the device is running on Jelly Bean 4.2.2, which is the latest release of Android firmware. And when operating on Google’s platform we can only think about customization and optimization operations. As you know, when owning an Android device as powerful as the Galaxy S4, it is really hard not to try to obtain more power from the same. Therefore, you will be tempted in rooting, flashing a custom recovery image and updating with custom ROMs and unofficial software.
The mentioned procedures are complex ones that should be applied only by those who are used with the same – the warranty of your device will get void and if you don’t know what you are doing you can end up in bricking your Android powered handset. Anyway, as you will notice, when trying to tweak your Galaxy S4, you will also have to first learn how to boot your device into recovery or download mode.
The Download Mode usually must be accessed when updating with official firmwares. I am talking about manual updates procedures, as the OTA releases are being applied automatically. So, if Samsung or Google is releasing a new stock Jelly Bean and you need to manually update your Galaxy S4 with the same (via Odin), you will notice that somewhere during the flashing procedure you will have to boot your smartphone into download mode.
Then, you need to learn how to enter the recovery mode when dealing with more complex tasks, like rooting, installing a custom ROM firmware, making Nandroid backups, perform maintenance, optimization and customization procedures and so on. Be aware that your device is being powered by a stock recovery mode; for applying the mentioned operations you will have to replace the stock recovery with a custom one, like CWM recovery. Now, the method explained below will teach you how to boot your Galaxy S4 into stock and custom recovery mode, so you have nothing to worry about.
Anyway, that was all for now, meaning that you can check on how to enter download, or recovery mode from your Samsung branded device.
How to Boot Samsung Galaxy S4 into Recovery Mode
Turn off your phone.
Then, reboot it by pressing on Volume Up, Home and Power buttons at the same time, for a few seconds.
Release the buttons as soon as you notice the stock, or custom recovery logo displayed on your handset.
Use the recovery menu in order to complete several operations.
You can boot into Android by returning to the recovery main menu; from there just select “reboot system now”.
How to Boot Samsung Galaxy S4 into Download Mode
Similar with the recovery mode, you first have to turn off your smartphone.
Then, reboot the handset by pressing on Power, Volume Down and Home buttons together.
When the “warning” message will be displayed release the buttons.
Press Volume Up in order to confirm that you want to boot into download mode.
You can now safely connect your device with the computer as the download mode has been successfully reached.
So, that was all; I know that the process is quite easy to complete but there are users who haven’t booted their Galaxy S4 into download or recovery mode until now. If this guide was helpful for you, don’t forget to share your experience among your android friends community.
Most people realize they can boot into safe mode on a Windows box but did you know you can boot your Samsung Galaxy S4 into Safe Mode too?
Booting your Droid into Safe Mode loads the core operating system sans the crap. In other words, all superfluous apps and widgets won’t load which leaves only factory installed stuff. If your phone works fine in Safe Mode but quirky in Normal Mode then you have good reason to believe that uninstalling one or more apps will fix things.
If you’re noticing that your Galaxy S4 locks up often, the battery is draining faster than normal, or the phone takes too long to startup then booting to Safe Mode is perfect because it lets you uninstall aberrant apps and gets your phone back on track.
Booting the Samsung Galaxy S4 to Safe Mode
Hold down the power button for 2 seconds to bring up your phone options.
Confirm the power off operation…
Now as the phone boots up keep pressing the menu soft key which is immediately to the left of the Home Button.
You might feel silly tapping the bottom left side of your phone as it turns on because it won’t seem like anything is happening. That’s fine, just find the nearest vacant room, close the door and keep tapping your heart away until the Home Screen emerges.
Astute observers will immediately notice the monochrome Safe Mode insert along the bottom left edge of the screen
Log in the phone and flip through your home screens.
Only factory apps are available in Safe Mode so your phone might seem banal but it should feel more responsive.
Tap your way to Settings (tap the left menu key next to the Home button and choose Settings)
It’s hiding behind the Safe Mode screen stamp…
We want the Application Manager so touch the More tab and scroll down midway.
Start browsing through your Apps starting with the most recently installed. Unfortunately I couldn’t find an easy way to sort by install date so it looks like you can only sort alphabetically or by file size (tap the menu soft key again for those options).
When you find a potentially culpable App, tap it in the list and choose Uninstall.
Keep methodically going through each App and uninstalling one by one until you find the unruly App that’s flubbing up your phone. It’s a bit of a pain but I don’t see an easier way of doing this; however, if you’ve had better success please share your knowledge in the comments below.
Consider a Factory Reset
In more extreme cases you may want to consider a full factory reset. If you have voluminous apps and think it’ll take you more than half a day to uninstall them or if your phone has become virtually unusable it might make sense to restore your phone to the factory defaults.
This will nuke all your apps and settings so make sure you have critical items backed up first.
To start the Reset, revisit Settings and tap the Accounts tab.
Scroll to the very bottom and choose Backup and Reset. Note: If you’re in Safe Mode the word Backup is obstructed by the Safe Mode graphic in the bottom left corner of the screen.
It’s kind of hard to see the Backup and reset button but just touch and trust me – you’ll end up where you want to be.
Take a thoughtful pause… then press the Factory Data Reset button to zap your phone.
When you’re ready to get out of Safe Mode, just power down the phone normally and reboot. As your phone starts up, forget any fancy finger tapping and you’ll boot directly to normal mode.
Link2SD is an android application by Bulent Akpinar that lets you move apps and games to the 2nd partition of your SD card. Why do we have to use Link2SD when Froyo and Gingerbread’s Native Apps2sd moves the files to the SD card? Native apps2sd only moves the apk file of the application leaving other files in internal memory thus you still have to manage your on-board memory and limit your choice of apps because it will eat up your memory and later on you cannot install any files anymore. Additionally, widgets and some applications are not intended to be moved to the SD card. However, Link2SD is only for root users because it is required that your phone is ROOTED.
The idea behind the application is the same. But Link2SD has more relevant features which the Native Apps2sd lacked giving Android 1.5 and up users the chance to have a taste of what it’s like to have a big phone memory. Additional features were added by the developer to furher optimize the usage of android devices. By using Link2SD, you can move not only the application file, but also the dalvic-cache and libray files of the application. This means that data will be the only one left to consume your internal memory thus installing applications and games would be easier because you can install anything you want without worrying about the famous low memory problem. Furthermore, Link2sd covers all files even moving widgets and the unmoveable applications to the 2nd partition of your SD card.
This is a step by step guide on how you can run Link2SD on your device. This tutorial will work for both stock and cutom ROMs. For ClockWorkMod Recovery users, you can check the other guide below. Follow all the instructions carefully to eliminate possible problems.
First you have to download MiniTool Partition Wizard Manager. You can download it in the link above, download it and install it on PC.
Insert your SD card to a card reader and open it on your computer.(not via USB cable)
Back up all your files to the computer because partitioning will wipe your data.
Open Mini Tool in your computer. Locate your SD card (be careful in choosing and make sure not to choose the drive of your computer)
Right click and choose Delete.
Right click on it again and choose Create New. Create “FAT32″ partition (This is where all your media files will go. Be sure to make it bigger than the 2nd part)
Select “Create as: PRIMARY”
Next, create an ext2/ext3/ext4 partition (I suggest ext2 cause it works on all roms and kernels). This is where your apps will go. I suggest a value of 512Mb would be big enough but its your choice...
Select “Create As: PRIMARY” (make sure that it is both set to primary because it will not work if it is not set to primary)
Click the “Apply” button on the top left corner and wait for it to finish the process. Done.
Put back your SD card to your phone and switch it on.
Download and install Link2sd from Google Play Store link given above.
Open Link2sd. You will be prompted to choose between ext2, ext3, ext4 and FAT32. Select one. (Give preference in this order ext4>ext3>ext2>fat32/16, Not all may be compatible with your kernel so try each one in the order of preference and use the highest ranking one that works. ext3 is compatible with my kernel so I use that.)
It will say mount script created. Reboot your phone now.
Open link2sd and if the message doesn’t show up, you succeded.
Go to Link2sd>Settings>check the autolink (to automatically move apps upon installation)
If you already have some apps, select “move to phone” then after moving select “Create Link” (be sure to check the three files: app, dalvic-cache and library files)
To check your memory, select “Storage Info”. This will show you the current state of your internal memory, FAT32, and ext2 partition.
Now you’re done and ready to install vast amount of applications as you wish!
FOR CLOCKWORKMOD RECOVERY USERS ONLY (ALTERNATIVE METHOD)
NOTE: You can also use the instructions above. This guide will work on both stock and custom ROMs.
Back up all your files to your computer. Partitioning wipes the files of your SD card.
Go into recovery mode
Select “Advanced”
Select “Partition SD card”
Choose your SD-ext size (if you’re using a 2Gb SD card, choose 512Mb. If your SD card is 4Gb or greater, you can choose 1024Mb)
Select 0 swap
Wait for the process to finish. Reboot.
Download and install Link2SD from Google Play Store.
Open Link2SD you will be prompted to choose between ext2, ext3, ext4 or FAT32. Choose ext4.
To begin, Rooting is the process whereby one can gain advanced control over their devices.
Advantages of ROOTING:
Delete unwanted apps
Expand system memory
Theming your device
Moving apps to SD-Card
Installing Firewall
many more
But the disadvantage which follows is:
WARRANTY BECOMES VOID (you can always gain it back by installing Official Firmware)
P.S: I am not responsible for anything which goes wrong. The process mentioned has been tried several times and is universally recognized. Therefore if anything goes wrong it'll be Your and solely your fault. PS: This Rooting method is only for people on 2.3.x Firmware i.e GINGERBREAD. Pls do not follow this if you are on Froyo.
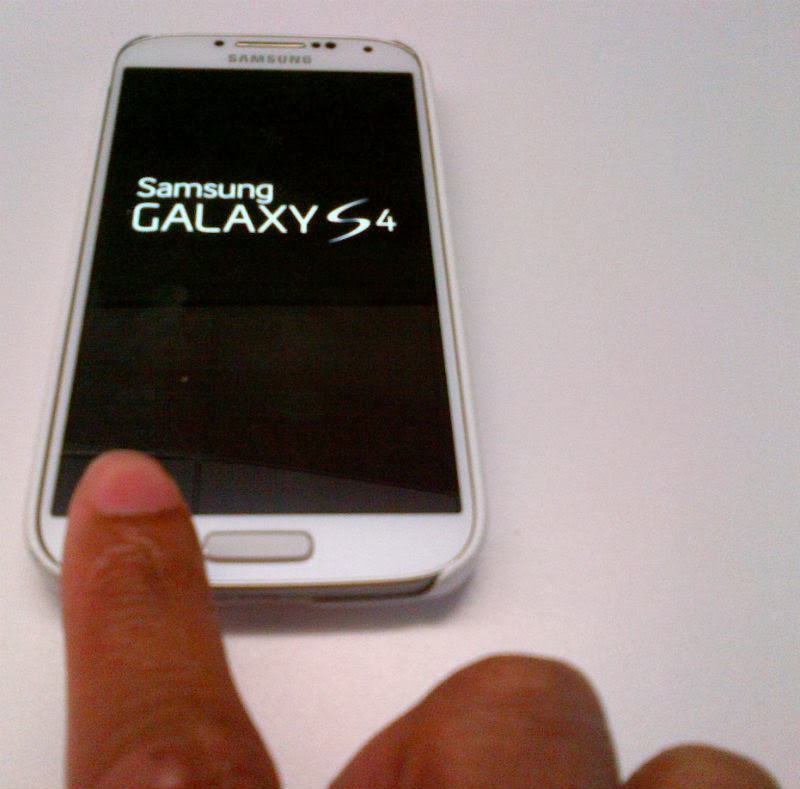
Once off, press HOME and POWER button until you come to a screen like this.
Using Volume Up and Down key select Option APPLY UPDATE FROM SDCARD. Press HOME key to select the option as touch won't work.
Then select CHOOSE ZIP FROM SD CARD.
Now select the file you downloaded her.
After installing finishes go back and Reboot Device.
Congrats you have finished rooting your device.
To UNROOT Simply download Unroot.zip and follow Steps 2 to 5.
Install CM for Samsung Galaxy Ace (cooper) Note: DISCLAIMER Modifying or replacing your device's software may void your device's warranty, lead to data loss, hair loss, financial loss, privacy loss, security breaches, or other damage, and therefore must be done entirely at your own risk. No one affiliated with the CyanogenMod project is responsible for your actions. Good luck.
Installing a custom recovery
Download ClockworkModRecovery kernel (Applicable to Gingerbread only)
Once the CWM zip file is downloaded, place it to your sdcard.
Now reboot in recovery mode by holding Home & Power buttons.
Select Apply Update from SDcard and select the CWM zip file placed in your sdcard.
Restart. For verifying, go into recovery again. You will find that recovery has been updated to CWM Recovery.
For the instructions following after this, the phone needs to be turned ON (either normally or in CWM Recovery).
Installing CyanogenMod from recovery Note: Some devices do not have removable SD cards. Regardless, there should still be a partition on the device named "/sdcard" that can be used for flashing purposes, even though the contents of /sdcard may actually be in internal storage.
Download the prebuilt release of CyanogenMod you wish to install. (Or if you've built CM yourself, look in the $OUT directory for the .zip.)
Optional: Download any supplemental 3rd-party applications packages for the device you wish to use.
Place the CyanogenMod rom .zip file on the root of the SD card using adb:
Transfer your file(s): adb push YOURROMZIP.zip /sdcard/
If you boot directly to recovery and have an internal sdcard, you may need to run adb shell mount /sdcard or mount data through the recovery menu before transferring.
If you see "error: device not found" there is likely a driver issue on the PC.
If you see "error: insufficient permissions for device", try "adb kill-server" and then run "adb devices" to see if the device is attached.
On some devices, the zip file can be copied to the device using standard USB Mass Storage or MTP support. Boot the device normally and transfer the file to it.
Optional: Place any supplemental packages (e.g. Google Apps or kernel) .zip file(s) on the root of the SD card.
Boot to recovery mode on the device by holding Home & Power button until Samsung logo appears, then release Power.
Once the device boots into the ClockworkMod Recovery, use the physical volume buttons to move up and down. On most devices, the power button is used to confirm your selection, although for some devices the power button is used as a "back" button to go up one level, in which case the home button is used to confirm the selection.
Optional/Recommended: Select backup and restore to create a backup of the current installation on the device.
Select the option to wipe data/factory reset.
Select install zip from sdcard.
Select choose zip from sdcard.
Select the CyanogenMod file you placed on the sdcard. You will then need to then confirm that you do wish to flash this file.
Optional: Install any additional packages you wish using the same method.
Once the installation has finished, return back to the main menu, and select the reboot system now option. The device should now boot into CyanogenMod.
We love Android, but rooting your phone can give you the opportunity to do so much more than your phone can do out of the box — whether it’s speeding it up with overclocking or customising the look of your phone with themes. Here’s how to root some of the most popular phones with minimal effort.
Rooting, for those of you that don’t know, means giving yourself root permissions on your phone (we’ve heard all the “root” gags before, thanks). It’s similar to running programs as an administrator in Windows, or running a command with “sudo” in Linux. With a rooted phone, you can run more apps (like backup or tethering apps), as well as flash custom ROMs to your phone, which add all sorts of extra features. If you’re on the fence about rooting, check out our top 10 root-only apps that make it worth the hassle.
There are lots of different Android phones out there, and while some rooting methods might work for multiple phones, there is no one-size-fits-all guide for rooting every one of them. As such, we can’t show you how to root every phone in existence, especially since we can’t test every method. So we’re going to post methods for the most popular Android phones and keep it updated as new phones come out.
Glossary of Rooting Terms
As you learn more about the rooting process, you’ll probably run into a bunch of terms that can be confusing. Here are some of the most important ones and what they mean.
Root: Rooting means you have root access to your device — that is, it can run the sudo command and has enhanced privileges allowing it to run apps like Wireless Tether or SetCPU. You can root either by installing the Superuser application — which many of the below root processes include — or by flashing a custom ROM that has root access included.
ROM: A ROM is a modified version of Android. It may contain extra features, a different look, speed enhancements, or even a version of Android that hasn’t been released yet. We won’t discuss ROMs in depth here, but if you want to use one once you’re rooted, you can read more about doing that here.
Flash: Flashing essentially means installing something on your device, whether it be a ROM, a kernel or something else that comes in the form of a ZIP file. Sometimes the rooting process requires flashing ZIP file, sometimes it doesn’t.
Bootloader: Your bootloader is the lowest level of software on your phone, running all the code that’s necessary to start up your operating system. Most bootloaders come locked, which keeps you from rooting your phone. Unlocking your bootloader doesn’t root your phone directly, but it does allow you to root, then flash custom ROMs if you so desire.
Recovery: Your recovery is the software on your phone that lets you make backups, flash ROMs and perform other system-level tasks. The default recoveries can’t do much, but you can flash a custom recovery — like ClockworkMod — after you’ve unlocked your bootloader that will give you much more control over your device. This is often an integral part of the rooting process.
ADB: ADB stands for Android Debug Bridge, and it’s a command line tool for your computer that can communicate with an Android device you’ve connected to it. It’s part of the Android Software Developers Kit (SDK). Many of the root tools below use ADB, whether you’re typing the commands yourself or not. Unless the instructions call for installing the SDK and running ADB commands, you won’t need to mess with it — you’ll just need to know that it’s what most of the tools use to root your phone.
S-OFF: HTC phones use a feature called Signature Verification in HBOOT, their bootloader. By default, your phone has S-ON, which means it blocks you from flashing radio images — the code that manages your data, Wi-Fi and GPS connections. Switching your phone to S-OFF lets you flash new radios. Rooting doesn’t require S-OFF, but many rooting tools will give you S-OFF in addition to root access, which is nice.
RUU and SBF: ROM Upgrade Utilities (for HTC phones) and System Boot Files (for Motorola phones) are files direct from the manufacturer that change the software on your phone. RUU and SBF files are how the manufacturers deliver your over-the-air upgrades, and modders often post leaked RUU and SBF files for flashing when the updates haven’t been released yet. They’re also handy when downgrading your phone, if a rooting method isn’t available for the newest software version yet. You can flash RUUs right from your HTC phone, but Motorola users will need a Windows program called RSD Lite to flash SBF files.
Most Android Phones: The SuperOneClick Method
The majority of you will be able to use previously mentionedSuperOneClick for Windows to root your phone. So far, it’s been officially tested on the following phones:
Acer Liquid Metal
Dell Streak
HTC Magic (Sapphire) 32B
LG Optimus 2x
Motorola Defy
Motorola Flipout
Motorola Milestone
Motorola Milestone 2
Nexus One
Samsung Galaxy Ace. Note: SuperOneClick only works on the Galaxy Ace running 2.2.1 and below. If you have 2.3 or above on your phone, you’ll need to follow the steps at this XDA thread to root your phone.
Samsung Galaxy S
Samsung Galaxy S II
Samsung Galaxy Tab
Sony Ericsson Xperia X8
Sony Ericsson Xperia X10
However, it should work on many more. Forum threads abound on the internet where people claim it works with other devices, and they just haven’t been added to the “official” list. With that in mind, I’d recommend checking the rest of the methods on this page before you try SuperOneClick, to see if your phone already has an alternative method.
Also, if you want to double-check that SuperOneClick will work with your phone, a quick Google (e.g. superoneclick motorola milestone) will probably reveal whether it’s compatible.
What You’ll Need
A Windows PC: SuperOneClick has ports for Mac and Linux, but it’s pretty complicated to get it working. I haven’t used it myself, but you can check out its XDA Developers thread for more information. For the purposes of this guide, we’ll assume you have a working Windows PC to get this working. If you don’t have one, borrow one from a friend — after all, you’ll only need it once.
The USB Drivers for Your Phone: In order for your phone to fully communicate with your PC, you’ll need its USB drivers. To get them head to your phone’s manufacturer’s website and search for them on the Support page. Note: You can now grab an automatic driver installer at the SuperOneClick page on XDA and skip this step — though you can always download the drivers yourself if you so choose.
Previously mentionedSuperOneClick: This is the Windows program that will root your phone. It’s portable, so just download it and unzip it somewhere safe — no installation necessary.
The Process
First, find, download and install the USB drivers for your particular phone, if necessary. You can generally do a Google search for your device’s drivers, but you can just head to your manufacturer’s website too (e.g. HTC users will head to HTC’s website) and navigate to your device’s support page. Go ahead and install the drivers once they’re downloaded. Note: Again, you can now grab an automatic driver installer from SuperOneClick’s XDA page and skip this step if you so choose.
Next, make sure your phone is in USB Debugging mode. Head to Settings > Applications > Development, and check the USB Debugging box at the top.
Once you’ve done all that, start up SuperOneClick. Plug in your phone (make sure NOT to mount the SD card), and hit the “Root” button to root your phone — it’s that simple. When it finishes, you’ll see a message that says “Root files have been installed!” Hit Yes if it asks you to run a test, and if everything went according to plan, it should confirm that you have root permissions. You can now close out of the app.
To double check and make sure everything went well, when you open up your app drawer you should see an app called “Superuser”. If so, you’re good to go! You can now flash custom ROMs, run root-only apps and more. See the “What Now?” section below for more ideas.
Certain HTC Phones: The Unrevoked Method
If you’re running an HTC phone from 2010 and earlier, chances are you’ll need to use the Unrevoked tool. More specifically, Unrevoked roots the following phones:
If you have an HTC phone that isn’t supported by either method, Unrevoked may be working on support for it — they’re still actively developing the program and doing a great job. It usually takes them a few months, but once they get it up and running, it’s worth it. Unrevoked’s one-click method is a ton easier than the manual hacking you’ll have to do if you want root access right after a phone is released.
What You’ll Need
A Computer: Thankfully, Unrevoked is available for Windows, Mac and Linux. So as long as you have a PC handy, you can run it.
Previously mentionedUnrevoked3: When you head to Unrevoked’s website, you’ll see a list of phones. Click on yours, and you’ll probably be presented with two options — for a traditional root, you’ll want to make sure you download the “Unrevoked3″ tool, not “Unrevoked Forever”. It will automatically detect your operating system (Windows, Mac or Linux), so just hit the download link to grab the appropriate version.
HBOOT Drivers (Windows only): Windows users using Unrevoked will need to install a few drivers to get it working properly. Mac and Linux versions should be a plug-and-go affair.
The Process
If you’re running Windows, the first thing you’ll want to do is install the Unrevoked modified USB drivers (Mac and Linux users can skip the next two paragraphs). Download the drivers from this page, and extract them somewhere you’ll remember. Turn off your phone, then reboot into the HBOOT menu by holding the volume down button and then holding power. You should boot into a white screen. Plug your phone into your computer via USB, and wait for your phone to say HBOOT USB PLUG.
When it does, head to Start and search for Device Manager. Start it up and head to “Other Devices”, where you’ll see an “Android 1.0″ device. Right click on it and hit Update Driver Software. Click “Browse my computer for driver software” and navigate to the folder you extracted earlier. Hit next and let it install. If you get any warnings, just hit OK. When you’re done, and you should see the Device Manager now lists an Android Phone with “Android Bootloader Interface” under it.
Next, make sure your phone is in USB Debugging mode. Head to Settings > Applications > Development, and check the USB Debugging box at the top.
Now, start up the Unrevoked tool and plug in your phone (again, make sure to hit “charge only”). It should do everything for you automatically. Make sure you wait until Unrevoked says “Done” before unplugging your phone. If you open up your app drawer and see an app called “Superuser Permissions”, you’re done and can continue to flash custom ROMs, use root only apps and more (see the “What Now?” section for more inspiration).
Newer HTC Phones: The Revolutionary Method
From the makers of Unrevoked comes Revolutionary, a great new tool that unlocks the bootloader of many new HTC phones. This won’t actually root your phone, but after unlocking the bootloader, you can flash ClockworkMod Recovery and then flash a ROM of your choice, meaning you can flash a ROM that gives you root access. Currently, Revolutionary is in developer preview, but you can download it and try it on these supported phones:
A computer: You’ll need either a Windows or Linux computer to run Revolutionary.
Revolutionary: At the bottom of the page, you’ll see downloads for both Windows and Linux. After you click on one, you’ll be asked to name your phone, your HBOOT version, and enter your serial number, which will give you a beta key allowing you to use the program. You can find both your HBOOT version and serial number after you start up the program.
HTC Fastboot Drivers (Windows only): Windows users using Revolutionary will need to install a few drivers to get it working properly. Linux users won’t need these.
The Process
To unlock and root your phone with Revolutionary, first download the program as described above and extract the files to your desktop. If you’re on Windows, grab the HTC Fastboot drivers and install them as well. On your phone, head to Settings > Applications > Development, and make sure USB Debugging is turned on. Plug in your phone, and make sure it’s set to “Charge Only”.
Start up Revolutionary and make not of your HBOOT version. Head back to Revolutionary’s download page and pick your HBOOT version from the drop-down menu. The Revolutionary command prompt window should also list your serial number; copy that and paste it into the beta key box. Hit OK, copy your beta key, and then paste it into the command prompt. Revolutionary will root the phone, and reboot it a few times — just let it do its thing.
When it prompts you to download ClockworkMod Recovery, type Y and press Enter. If all goes well, it should flash ClockworkMod Recovery to your device, which allows you to root your phone and flash custom ROMs. Again, this will take a while; let your phone work. If it doesn’t work, you should be able to flash ClockworkMod by downloading ROM Manager from the Android Market and flashing it from the top option on the app’s home screen.
When all that’s done, you still need to gain root access to your phone. Download this ZIP file and put it on the root of your SD card (without extracting it). Shut down your phone, and boot it up into HBOOT. Usually this means holding the volume down button and then pressing the power button, though it may differ from phone to phone. Choose Recovery from the menu (using your volume rocker) and press the power button to enter ClockworkMod.
Once inside ClockworkMod, choose “Install ZIP from SD Card”, then pick “Choose ZIP from SD Card”. Choose the ZIP file you just added to your SD card, and let it do its thing. When you’re done, head back to the main menu and choose “Reboot System Now”. Once you’ve rebooted, check your app drawer for the Superuser app. If it’s there, you’ve achieved root, and you can get on to the really fun stuff (see the “What Now?” section at the bottom for ideas).
Newer Motorola Phones: The Pete Method
As you’ve undoubtedly heard, Motorola has gotten pretty controlling with its most recent phones, so SuperOneClick no longer works if you’ve updated Android to 2.3 Gingerbread. Luckily, in an attempt to root his Droid 3, developer Pete created a program that roots a number of Motorola phones, after which you can remove bloat and do whatever else you want to them (though certain phones may have a harder time flashing custom ROMs and kernels — you’ll need to search for specific methods related to your phone). Phones known to work with Pete’s Root Tool are:
Motorola Milestone 2
We haven’t tested this one ourselves, so we won’t go through the detailed process here. Hit the link below to download the program and see how it works.
The Desire Z is a special case. If you’re running 2.3 or above, you need to downgrade your phone back to 2.2 using this very involved method, then use a tool called Visionary to give it temporary root, and then go through a bit of manual hacking to make that root permanent. None of the Lifehacker editors have a Desire Z to test this on, but you can hit the link below to try it out for yourself. I’d also recommend heading over to The Unlockr for their video of the first step, using Visionary.
Rooting the Galaxy Nexus is a simple matter of unlocking the bootloader and installing the proper superuser binaries. You have quite a few options, including a fairly simple flashing method that you can read about at the link below.
Rooting the Galaxy S II is fairly easy, as long as you have a Windows PC handy. Like its predecessor, the Galaxy S, the Galaxy S II has many variants, meaning there’s no one rooting method that will work for everyone. Your rooting method will depend on which carrier you’re on, as well as what country you’re in. Non-US users with the i9100 version of the phone can check out this method. Be extra sure you’re following a guide for your specific device — most guides will have country codes that can help you find the right one.
For now, most of the guides require that you have the Samsung drivers for Windows and a program called Odin, which you’ll find in the guide for your phone. Odin will flash the ClockworkMod recovery to your phone, which you can use to push the Superuser app to your device, which gives you root access. You can then also flash ROMs and other things from ClockworkMod, if you so desire.
For more information, check out the All Things Root guides for the international Galaxy S II over at Android Forums.
What Now?
Now, the world is your oyster. Here are some things you can do:
Troubleshooting Problems
If you run into a problem rooting or flashing a ROM on your phone, we’ve written a guide to troubleshooting an almost-bricked Android phone. Be sure to check that out, as well as the instructions below on how to unroot your phone if worst comes to worst.
Unrooting Your Phone
If, in the end, you decide you want to go back to your over-the-air updates, stock ROM and unrooted goodness, you can unroot your phone. The process is a bit different for every manufacturer and every device, but these guidelines should get you on the right track.
This will return it to exactly how it was when you bought it from the store. You’ll lose all your apps, settings, ClockworkMod recovery and you’ll get over-the-air updates again.
For Motorola Phones: If you have a Motorola phone, you’ll need to use RSD Lite, the program that Motorola and its partnered carriers use to restore almost-bricked phones. RSD Lite isn’t exactly an official program open to the public, so you’ll have to Google around to find a version that works for you. You’ll also need an SBF file for your device, which is the original stock ROM that RSD Lite will flash to your phone. Google for this as well. RSD Lite only runs on Windows, so if you’re a Mac or Linux user, you’ll need a Windows partition or a friend with a Windows machine to help you out.
For HTC Phones: HTC phones can flash stock ROMs, known as RUUs, right from the phone’s bootloader. You’ll need to Google around for your device’s specific RUU file, but once you download it, save the ZIP file to your SD card and rename it (to something like PG05IMG.zip — the download page for the RUU file should specify which filename is required), booting up your phone should automatically flash the stock ROM from HBOOT, HTC’s bootloader. Check out the video at the left to see an example of this on the HTC Thunderbolt.
For Samsung Phones: If you’re using a Samsung Galaxy phone, you can use a tool called Odin to reflash an OPS file, which is a stock ROM that will return your phone to factory settings. You’ll need a Windows machine and a copy of Odin, which you can find by Googling around the net (as its not an official tool). Check out the video to the left to see an example of Odin, and check out The Unlockr’s guide to using Odin to familiarise yourself. You may need to Google around for your specific device’s OPS file and instructions.
This guide should have you up and running with root permissions on nearly every Android phone out there.